Today, we’re going to talk about a super fun and delicious twist on the traditional cake pop: Cake Popsicles! These delightful treats are a larger version of cake pops, and you can enjoy them on a stick, just like a popsicle.
This easy recipe is perfect for your first time making cakesicles or even if you’re a cake pop pro. They’re a great use for leftover cake, and with so many decorating options, the possibilities are endless!
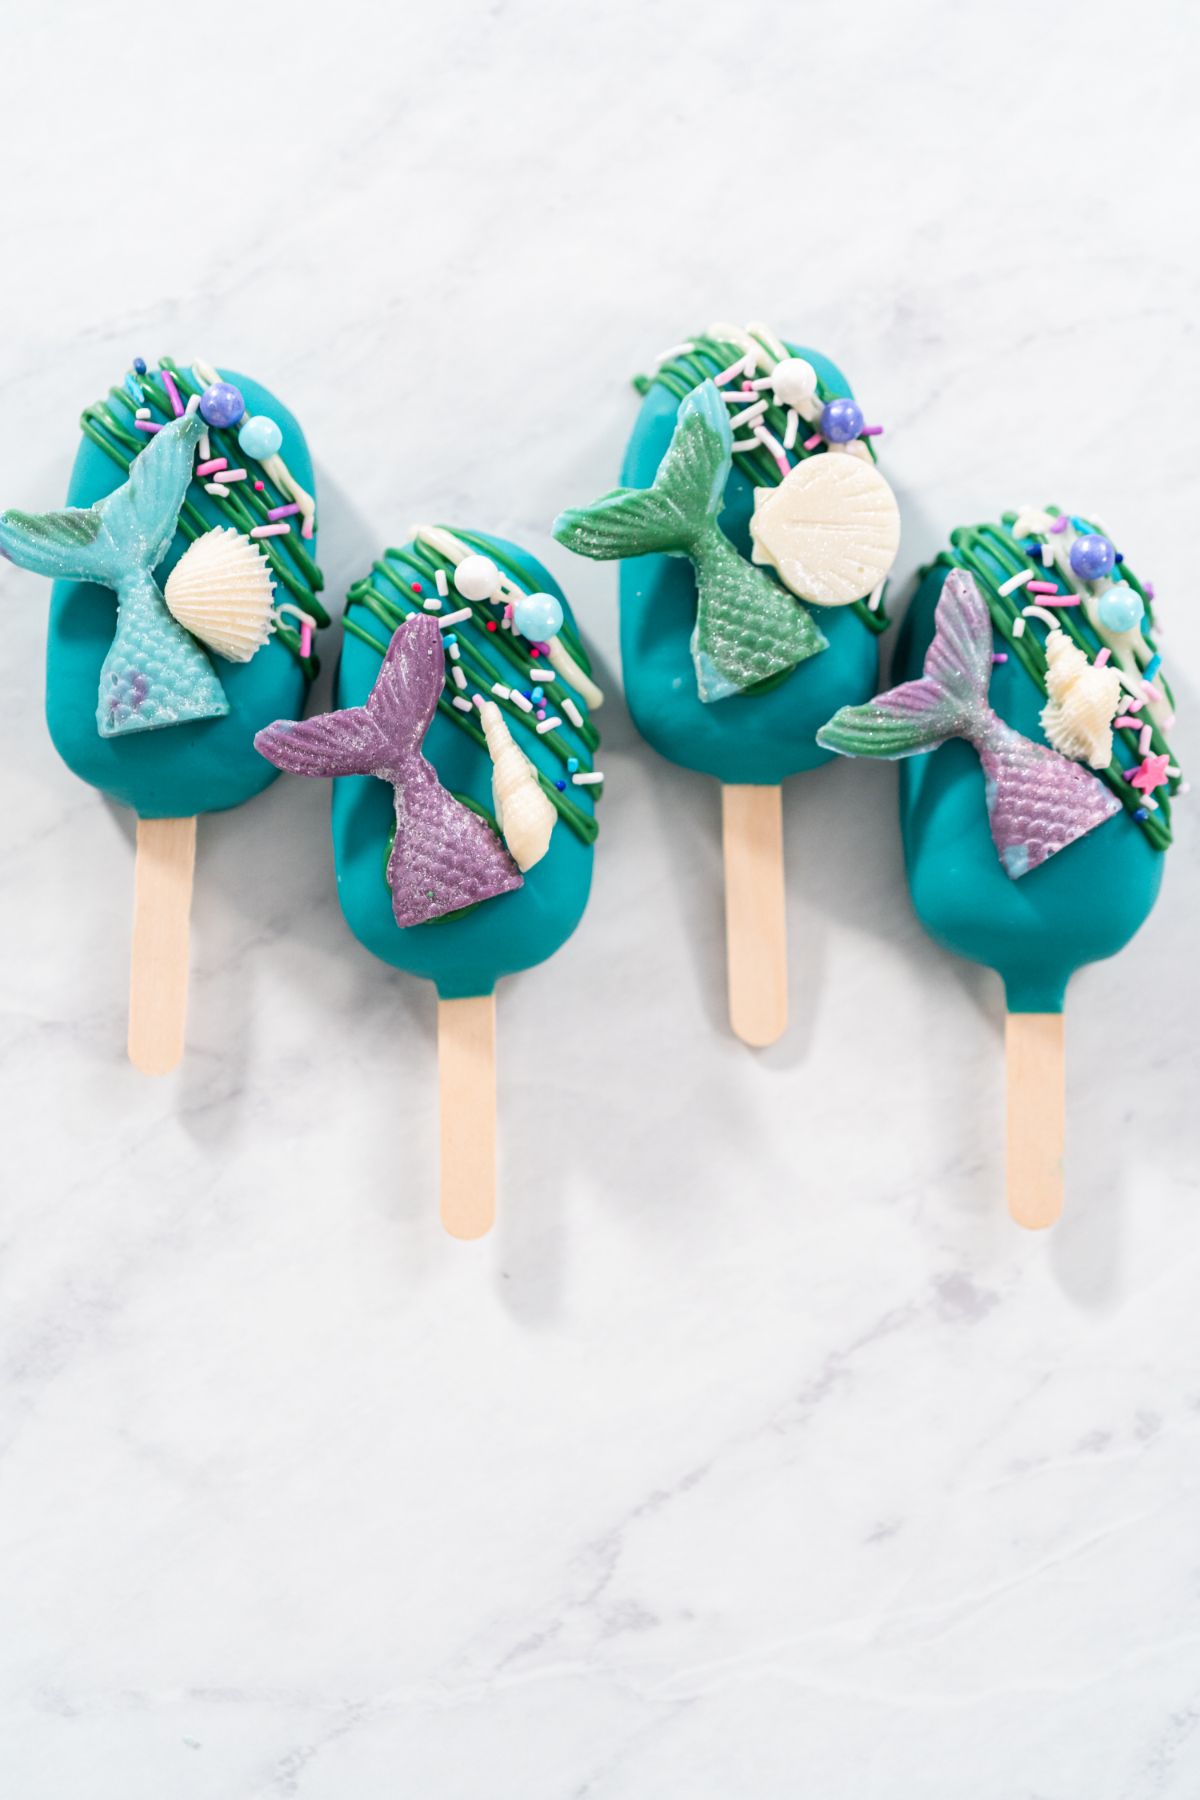
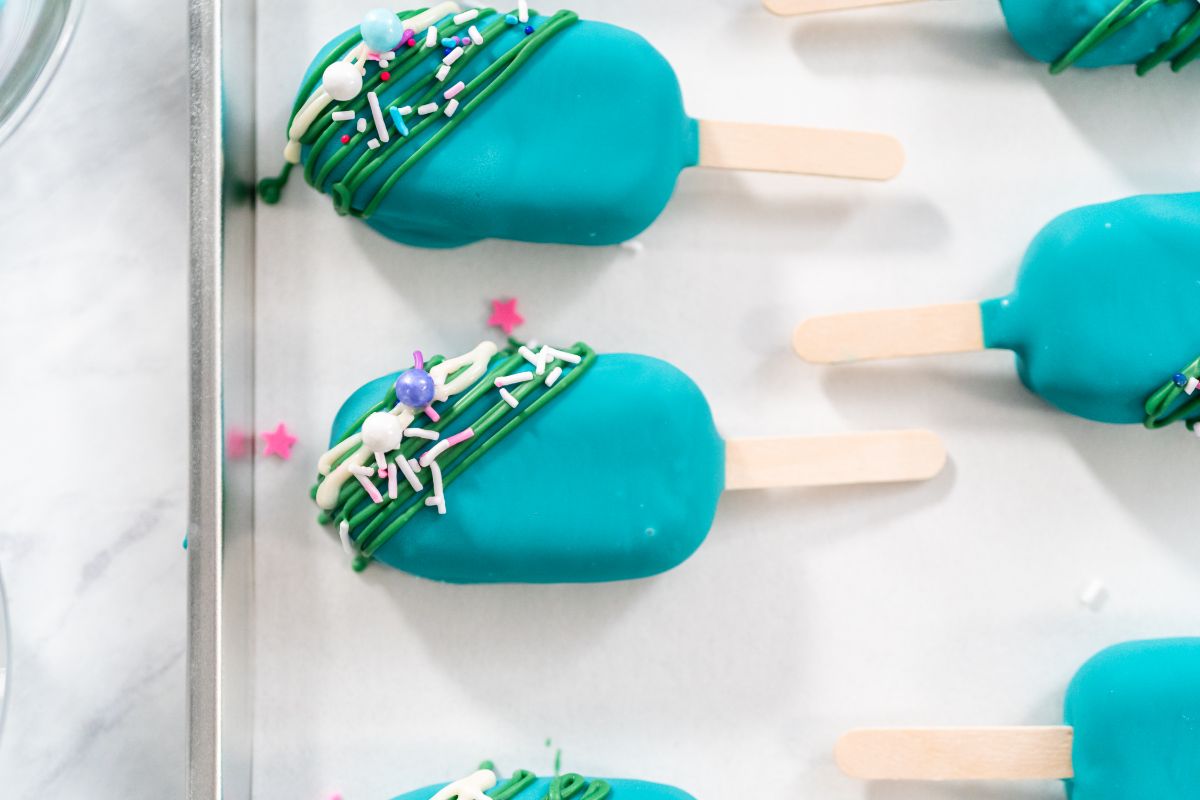
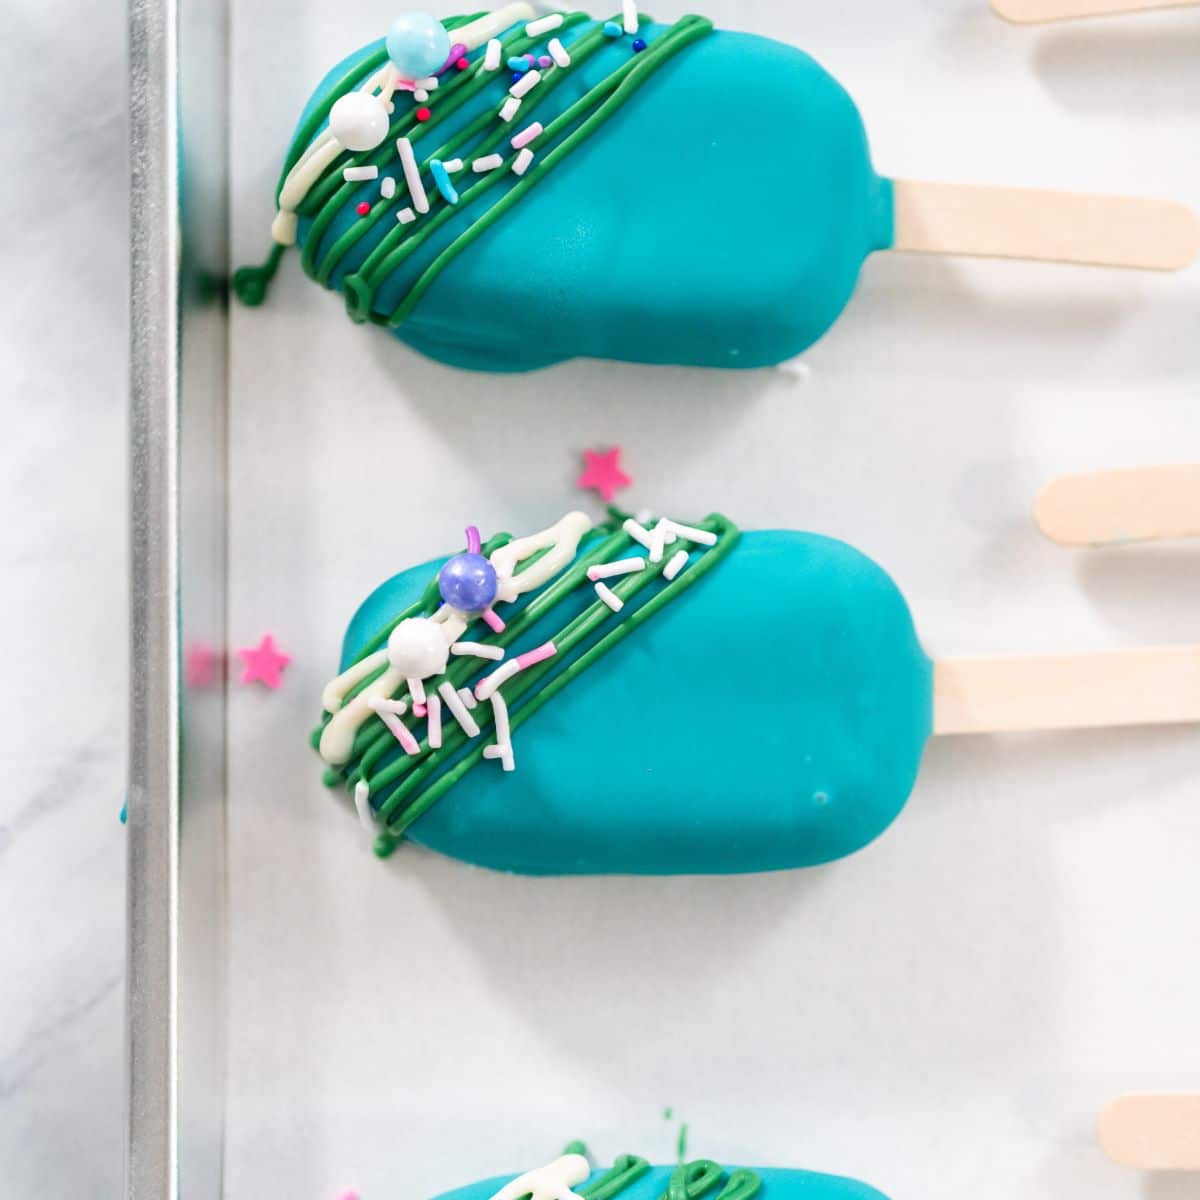
I made mermaid cake popsicles with edible shell decorations, sprinkles, and sparkles. (Check out my Moana cake ideas for more water-themed cake designs!)
Equipment
You’ll need a cakesicle mold to easily make these bite-size treats. You’ll also need cakesicle sticks or popsicle sticks.

")
Ingredients and Supplies
To make these easy cake popsicles, you’ll need just a few ingredients.
- Prepared cake from a cake mix (vanilla, chocolate, strawberry, or your favorite cake flavor)
- Cream cheese frosting (store-bought or homemade)
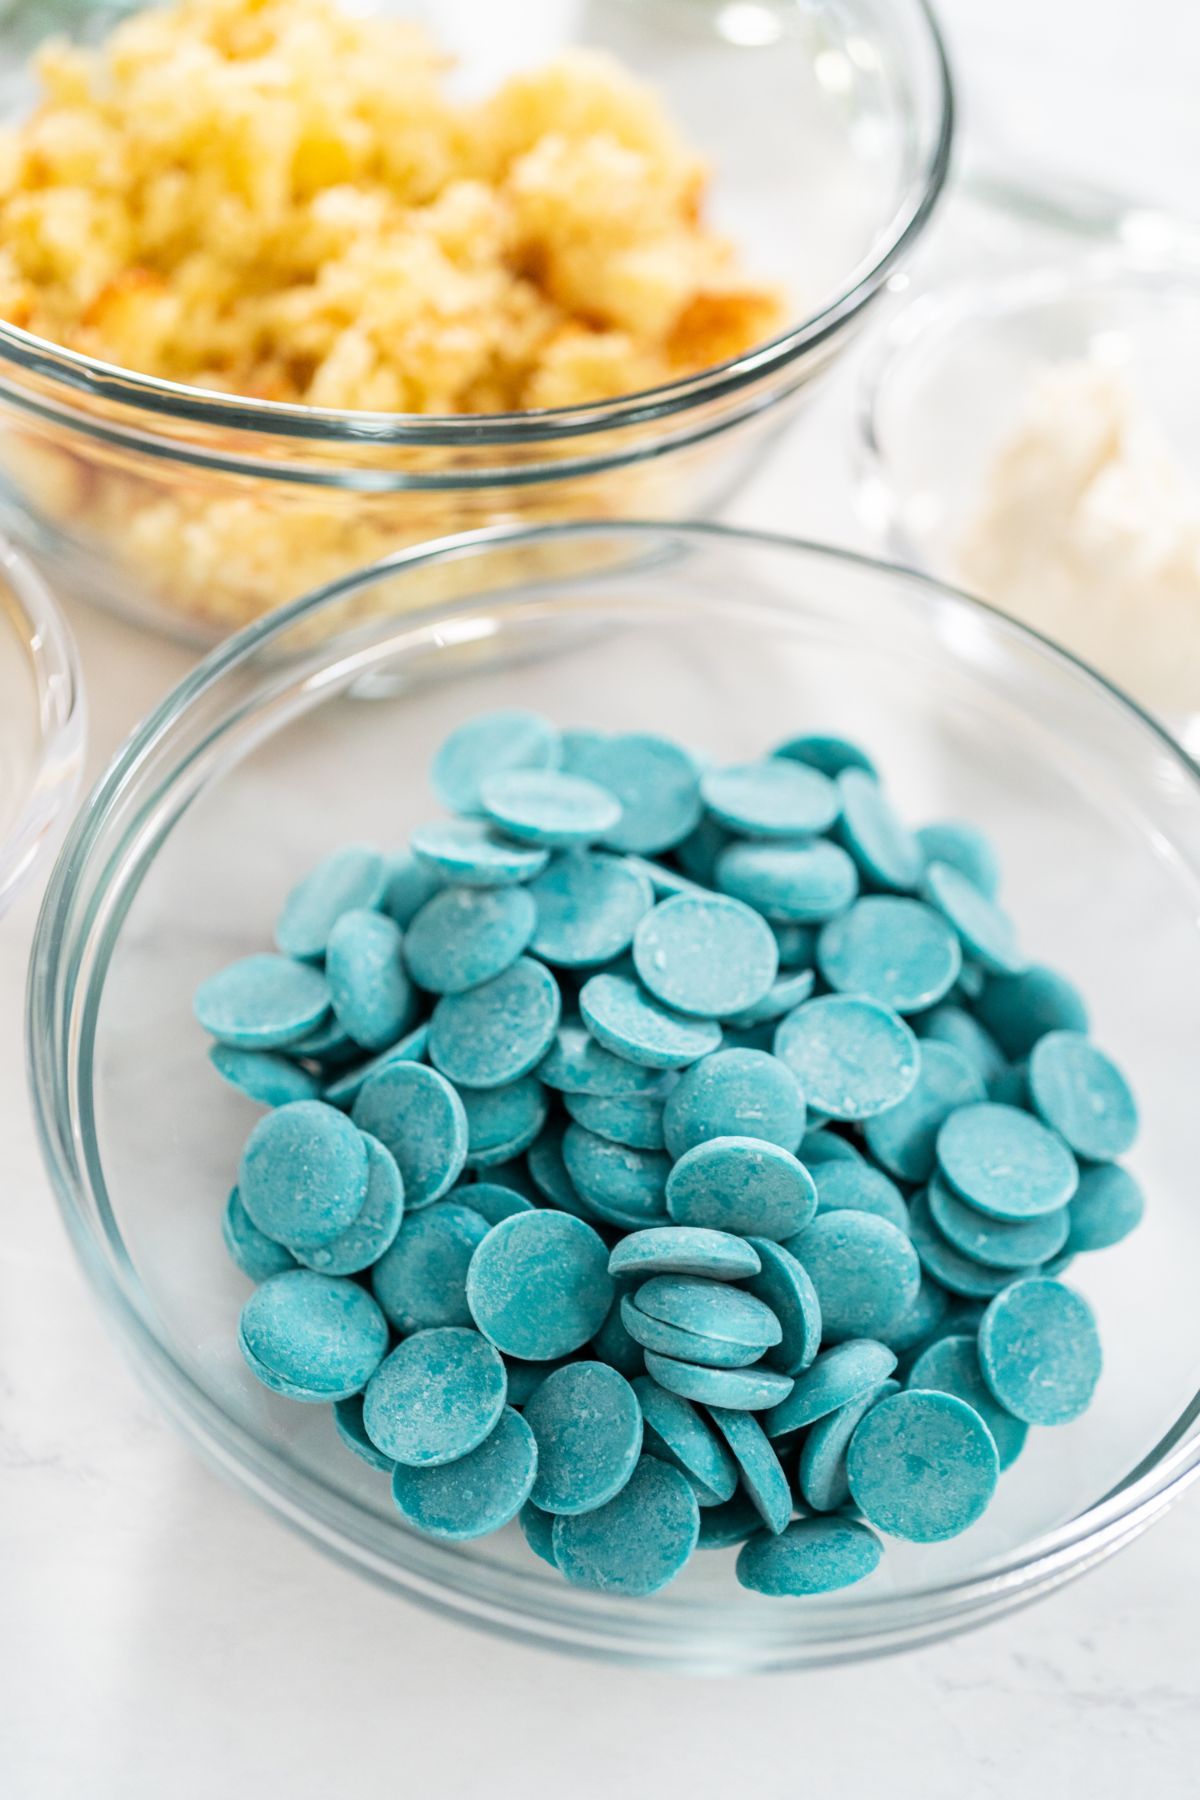
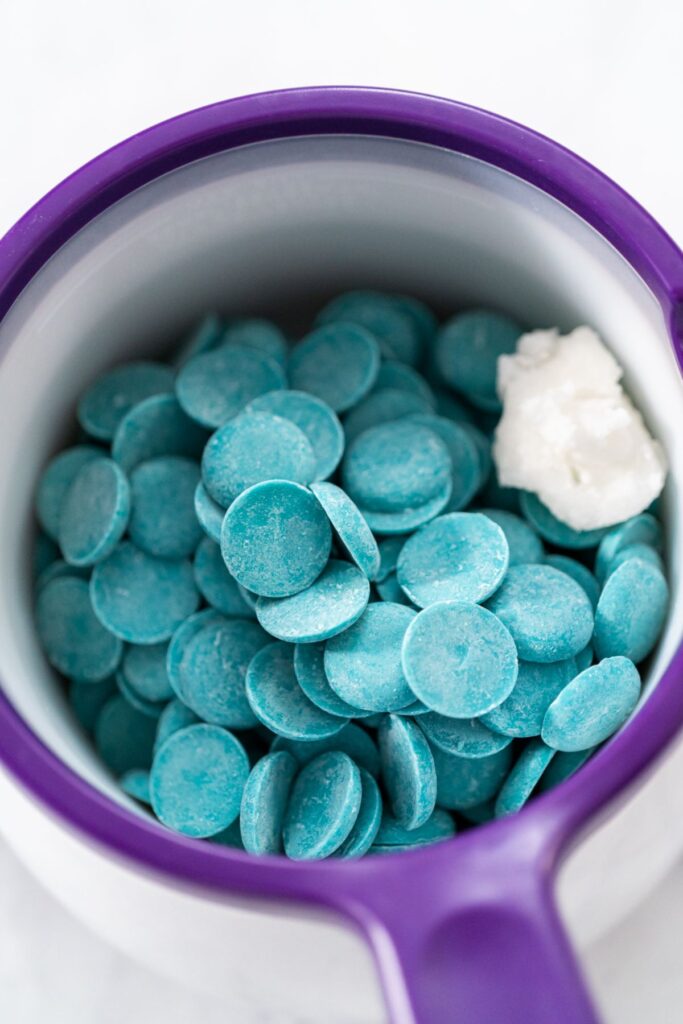
- Melting wafer chocolate or candy coating (dark chocolate, milk chocolate, white chocolate, or colored candy melts. These wafers and melts are very easy to use. Alternatively, you use real chocolate, but you’ll need to temper the chocolate.)
- Optional: cocoa butter, coconut oil, or vegetable oil
- Optional: gel food coloring and sprinkles for decorating
How to Make Cakesicles
I go into more detail in the recipe’s step-by-step instructions at the bottom of this post, but here are the steps to making these fun cake pops.
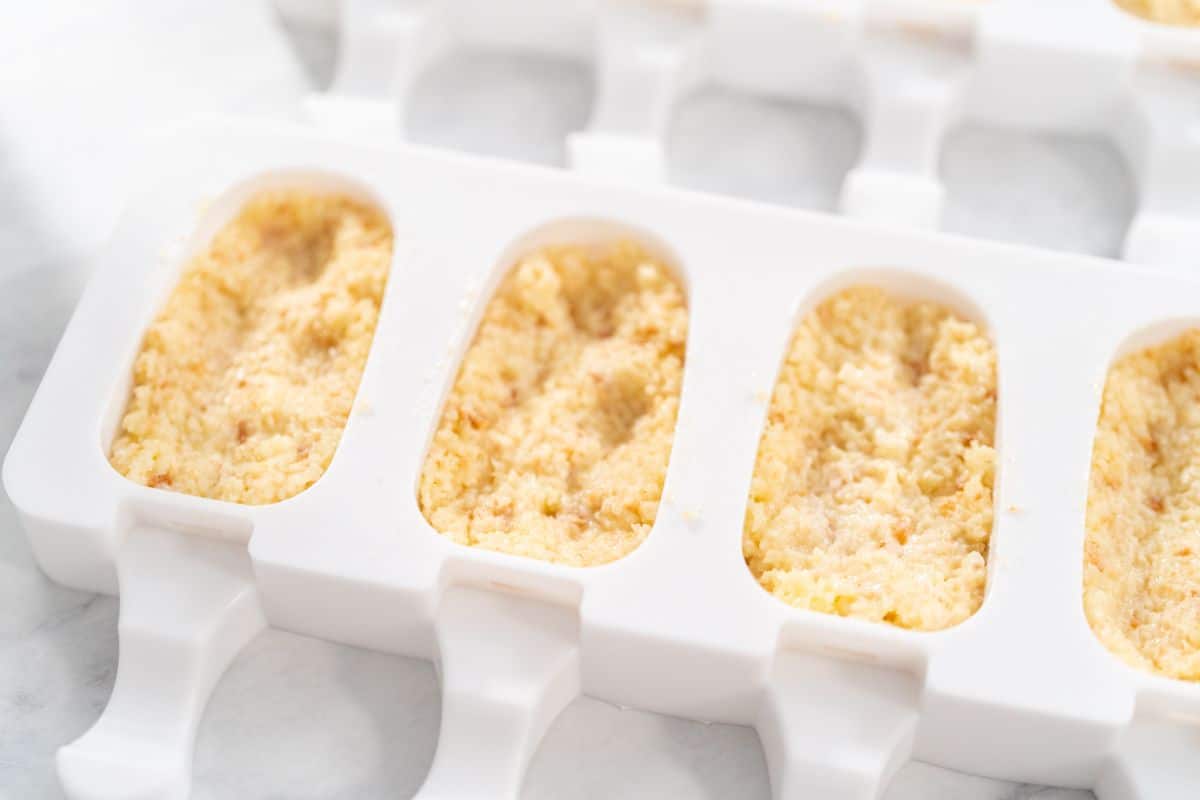
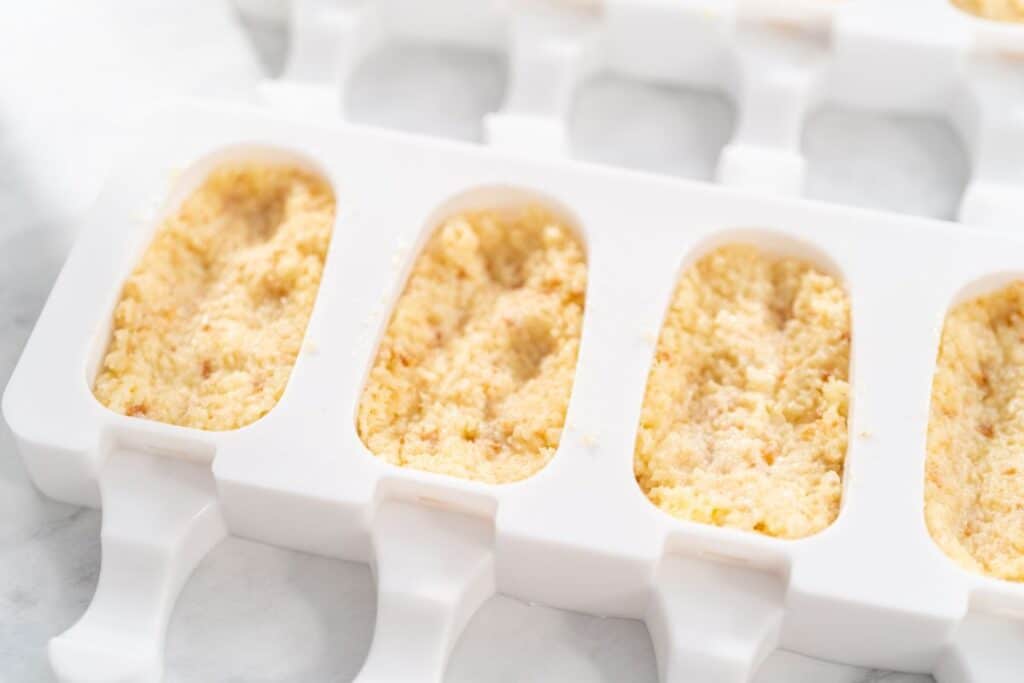
Start by baking and cooling your favorite cake. Crumble the cake and mix with frosting until you get a dough-like consistency. Press the mixture into silicone molds and insert popsicle sticks. Freeze for 30 minutes.
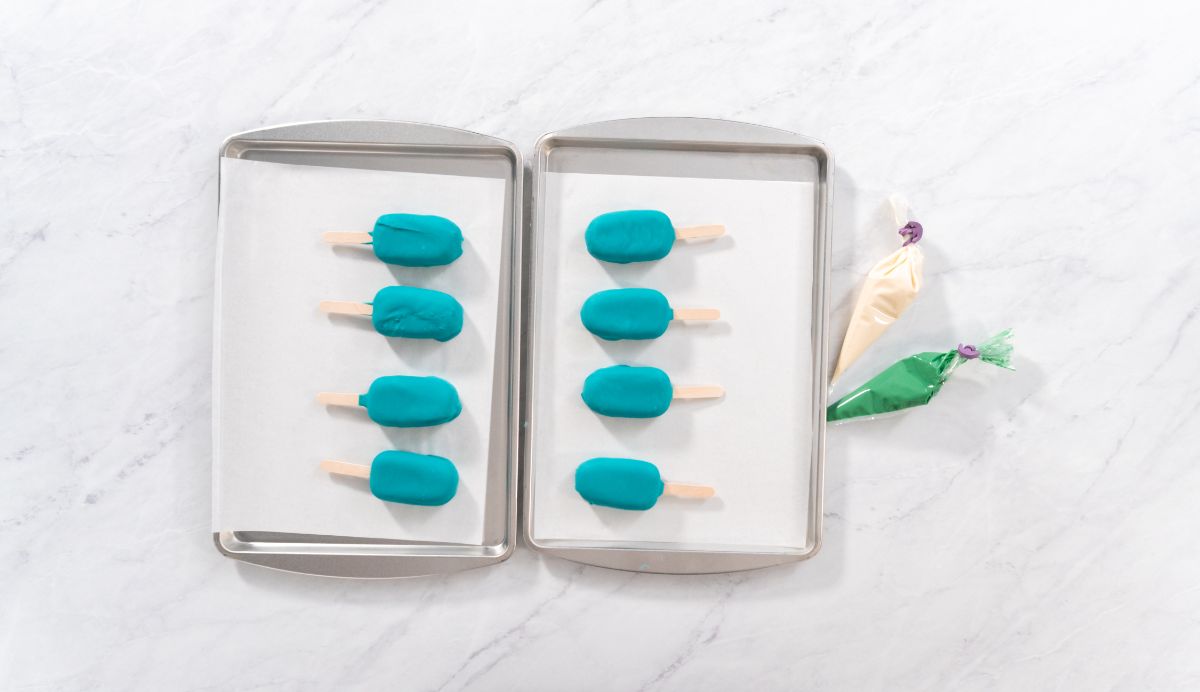
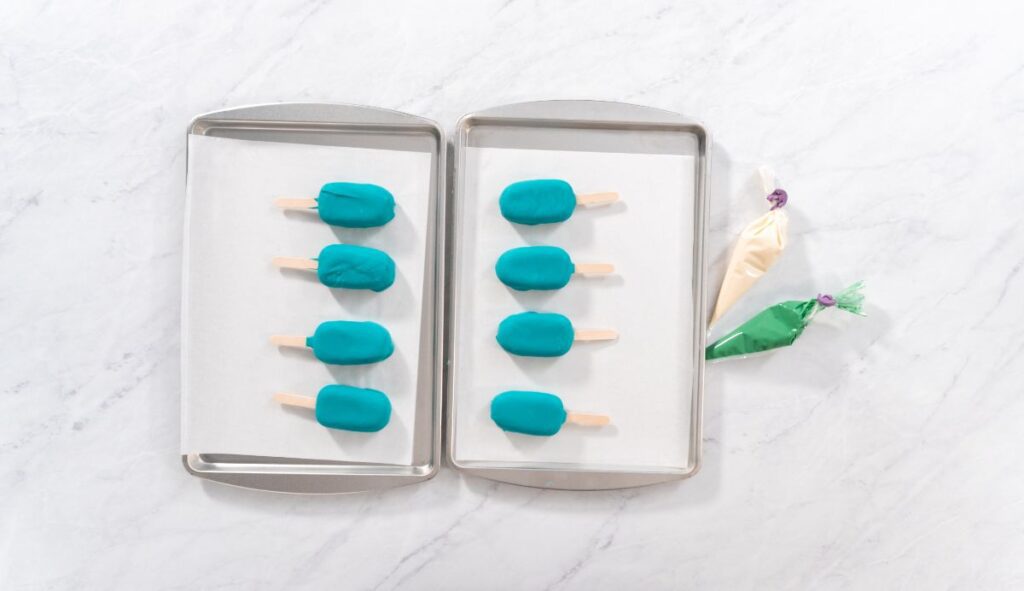
Melt your choice of chocolate or candy coating. Unmold the cake popsicles, then dip them into the melted coating. Tap off excess and let the coating set. Once set, decorate as desired and enjoy your delicious cake popsicles!
Remember, practice makes perfect! Don’t be discouraged if your first attempt at making cake popsicles isn’t perfect; each time you make them, you’ll get better at dipping and decorating.
Decoration Ideas
Once your cake popsicles have set, you can get creative with decorating! Here are some design ideas to get you started:
- Use a piping bag to drizzle melted candy melts over the pops and sprinkle with sprinkles or edible glitter, or get fancy by piping a more detailed cake decorating technique.
- Dip the tips of your cake popsicles in extra chocolate and roll them in crushed nuts, sprinkles, or cookie crumbs for added texture and flavor.
- Create themed cakesicles for birthdays, holidays, or other special occasions by using colored candy melts or gel food coloring and adding edible toppings.
When you’re ready to serve your cake popsicles, you can package them individually in clear plastic bags tied with a ribbon, making them perfect party favors or gifts for any occasion. Or, if you prefer, place them upright in a decorative container for guests to grab and enjoy.

FAQ
Cake popsicles are made from crumbled cake mixed with frosting, shaped into a popsicle form using a silicone mold, and coated in a chocolate or candy shell.
Yes, cake pops and cakesicles can be stored in the refrigerator in an airtight container for up to a week. However, unless you like a very crispy shell, it’s best to let them come to room temperature before enjoying them. The chocolate coating and cake will taste better when not too cold.
Cake popsicles are such a fun, versatile, and unique treat! They make fantastic party favors or special occasion treats for kids. So grab your silicone mold, and let’s get started!
Recipe and Instructions

Easy Cake Popsicles
Equipment
- cakesicle mold
- popsicle sticks
Ingredients
- 1 baked cake from one cake mix or one 9×13 homemade cake*
- 2 Tablespoons prepared cream cheese frosting store-bought or homemade
- 2 cups Melted chocolate or candy coating dark chocolate, milk chocolate, white chocolate, or colored candy melts**
- cocoa butter, coconut oil, or vegetable optional
Instructions
- Bake your choice of cake according to the package instructions. Let the cake cool completely before proceeding.
- In a large bowl, crumble the cake into fine crumbs. Add 2 tablespoons of frosting and mix until the cake mixture has the consistency of cake pop dough. Adjust the amount of frosting depending on the type of cake you’re using.
- Press the cake mixture into the silicone mold, filling the cavity evenly and without air bubbles. Insert a popsicle stick or cakesicle stick into each cake ball.

- Place the filled mold in the freezer for at least 30 minutes to help the cake popsicles firm up.
- While the cake popsicles are chilling, melt your chocolate or candy coating in a double boiler or microwave at 30-second intervals until smooth. You may need to add a small amount of cocoa butter or oil to thin the consistency.

- Add gel food coloring to the chocolate dip mixture if needed to get your desired shade.
- Remove the cake popsicles from the freezer and carefully unmold them. Dip each one into the melted chocolate, making sure to cover all sides of the cake. Gently tap off any excess chocolate.
- Place the coated cake popsicles on a tray lined with wax paper or parchment paper. Allow the chocolate to set up at room temperature or in the refrigerator.

Notes
Did you make these treats?
I’d love to hear from you! Leave a comment below or find me @dessertladyblog on Pinterest.


These are too cute! I love the mermaid theme for a cake popsicle!
Thank you so much!